How can we help?
Search our knowledge base or browse step-by-step guides to set up your workspace, manage your team, and get the most out of TimeOffLedger.
Explore Step-by-step Guide
TimeOffLedger supports annual leave, sick leave, unpaid leave, emergency leave, leave in lieu, unlimited PTO, and any custom leave type you define — each with its own rules and approval chain.
Yes. You can configure accrual schedules, pro-rating, tiered entitlements, and carry-forward limits per leave policy — giving you full control over how leave builds up and rolls over.
Yes. Set a maximum number of absent employees per day and the system will flag or automatically block conflicting requests before they are approved.
The live team wallchart shows approved, pending, and upcoming absences across teams and locations in one visual view — so managers can plan coverage and allocate resources before conflicts or deadlines arise.
Yes. Every leave management feature is available during the full 30-day free trial. No credit card required. See our pricing page for full plan details.
Yes. Unpaid time off is fully supported as a distinct leave type and is recorded separately alongside all other paid leave categories.
Approved leave flows directly into payroll preparation and timesheets, so your finance team always works from approved, up-to-date records.
TimeOffLedger is all-in-one HR software for leave management, attendance tracking (TimeLog), employee records, compliance documents, payroll preparation, and timesheets — from one connected system.
Most teams add workplaces, departments, employees, and leave policies in minutes. No complex enterprise onboarding.
Employees submit leave or check in/out via TimeLog. Managers review and approve with one click. Balances, attendance, and records update automatically.
It shows approved, pending, and upcoming absences in one visual view — so managers plan coverage before conflicts or deadlines arise.
Yes. TimeLog check-in/check-out data feeds timesheets. Approved leave and hours flow into payroll preparation — no re-entering data in spreadsheets.
Yes. Create multiple workplaces, assign location-based public holidays, and manage employees across regions.
Annual leave, sick leave, unpaid leave, emergency leave, unlimited PTO, and any custom type you define — with accrual, carry-forward, and per-day limits.
Admin (full control), Manager (approve team leave and timesheets), and Standard User (request leave, check in/out, view personal records).
Yes — 30 days, full features, no credit card required. See pricing for details.
Email admin@timeoffledger.com, call +1 775 522 9719, or use our contact form. We respond within 2 hours during business hours.
Growing businesses, HR teams, and operations managers who need reliable HR tools without enterprise complexity or pricing.
Creating a TimeOffLedger account is the first step toward managing employee leave efficiently. Once your account is set up, you’ll be able to configure your company, invite employees, create leave policies, and begin tracking time off in one centralized platform.
Before You Begin
Before creating your account, make sure you have:
- A valid email address.
- Access to your email inbox for verification.
- Your company or organization name.
- A secure password.
How to Create an Account
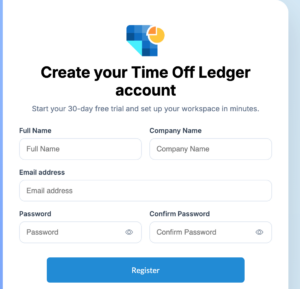
Follow these steps to create your TimeOffLedger account:
- Visit the TimeOffLedger website.
- Click Sign Up.
- Enter your full name.
- Enter your work email address.
- Create a secure password.
- Confirm your password.
- Accept the Terms of Service and Privacy Policy.
- Click Create Account.
If email verification is enabled, you’ll receive a verification email shortly after registering.
Verify Your Email Address
To activate your account:
- Open the verification email sent to your inbox.
- Click the Verify Email button.
- You’ll be redirected to TimeOffLedger.
- Sign in using your email address and password.
If you don’t receive the email within a few minutes, check your Spam or Junk folder before requesting another verification email.
Choosing a Strong Password
We recommend creating a password that includes:
- At least 8 characters.
- One uppercase letter.
- One lowercase letter.
- One number.
- One special character.
Avoid using common words, birthdays, or easily guessed passwords.
After Creating Your Account
Once your account has been created successfully, the next steps are:
- Set up your company profile.
- Configure working days.
- Add leave types.
- Invite employees.
- Create departments and teams.
- Configure approval workflows.
Completing these steps ensures your organization is ready before employees begin requesting leave.
Common Issues
I didn’t receive the verification email.
Try the following:
- Check your Spam or Junk folder.
- Make sure you entered the correct email address.
- Wait a few minutes and request a new verification email.
- Contact your email administrator if your organization blocks external emails.
The verification link has expired.
Verification links may expire after a period of time. Simply request a new verification email from the login page and follow the instructions again.
My email address is already registered.
If you see a message that your email is already in use, trysigning in instead. If you’ve forgotten your password, use the Forgot Password option to reset it.
Depending on your browser and your organization’s security settings, you may have the option to remain signed in on your personal device.
Once your TimeOffLedger account has been created and verified, you can sign in to access your dashboard and begin managing employee leave, reviewing requests, or configuring your organization.
Whether you’re an employee, manager, or administrator, signing in gives you access to the features available for your role.
Before You Begin
Before logging in, make sure you have:
- A registered TimeOffLedger account.
- A verified email address (if email verification is required).
- Your email address and password.
How to Log In
Follow these steps to sign in to your account:
- Navigate to the TimeOffLedger login page.
- Enter the email address associated with your account.
- Enter your password.
- Click Log In.
If your credentials are correct, you’ll be redirected to your dashboard.
Your Dashboard
After signing in, you’ll have access to your personalized dashboard.
Depending on your role, you may be able to:
Employees
- View your leave balance.
- Submit new leave requests.
- Check the status of pending requests.
- View upcoming company holidays.
- Update your personal profile.
Managers
- Review leave requests from team members.
- Approve or reject leave requests.
- View the team leave calendar.
- Monitor employee availability.
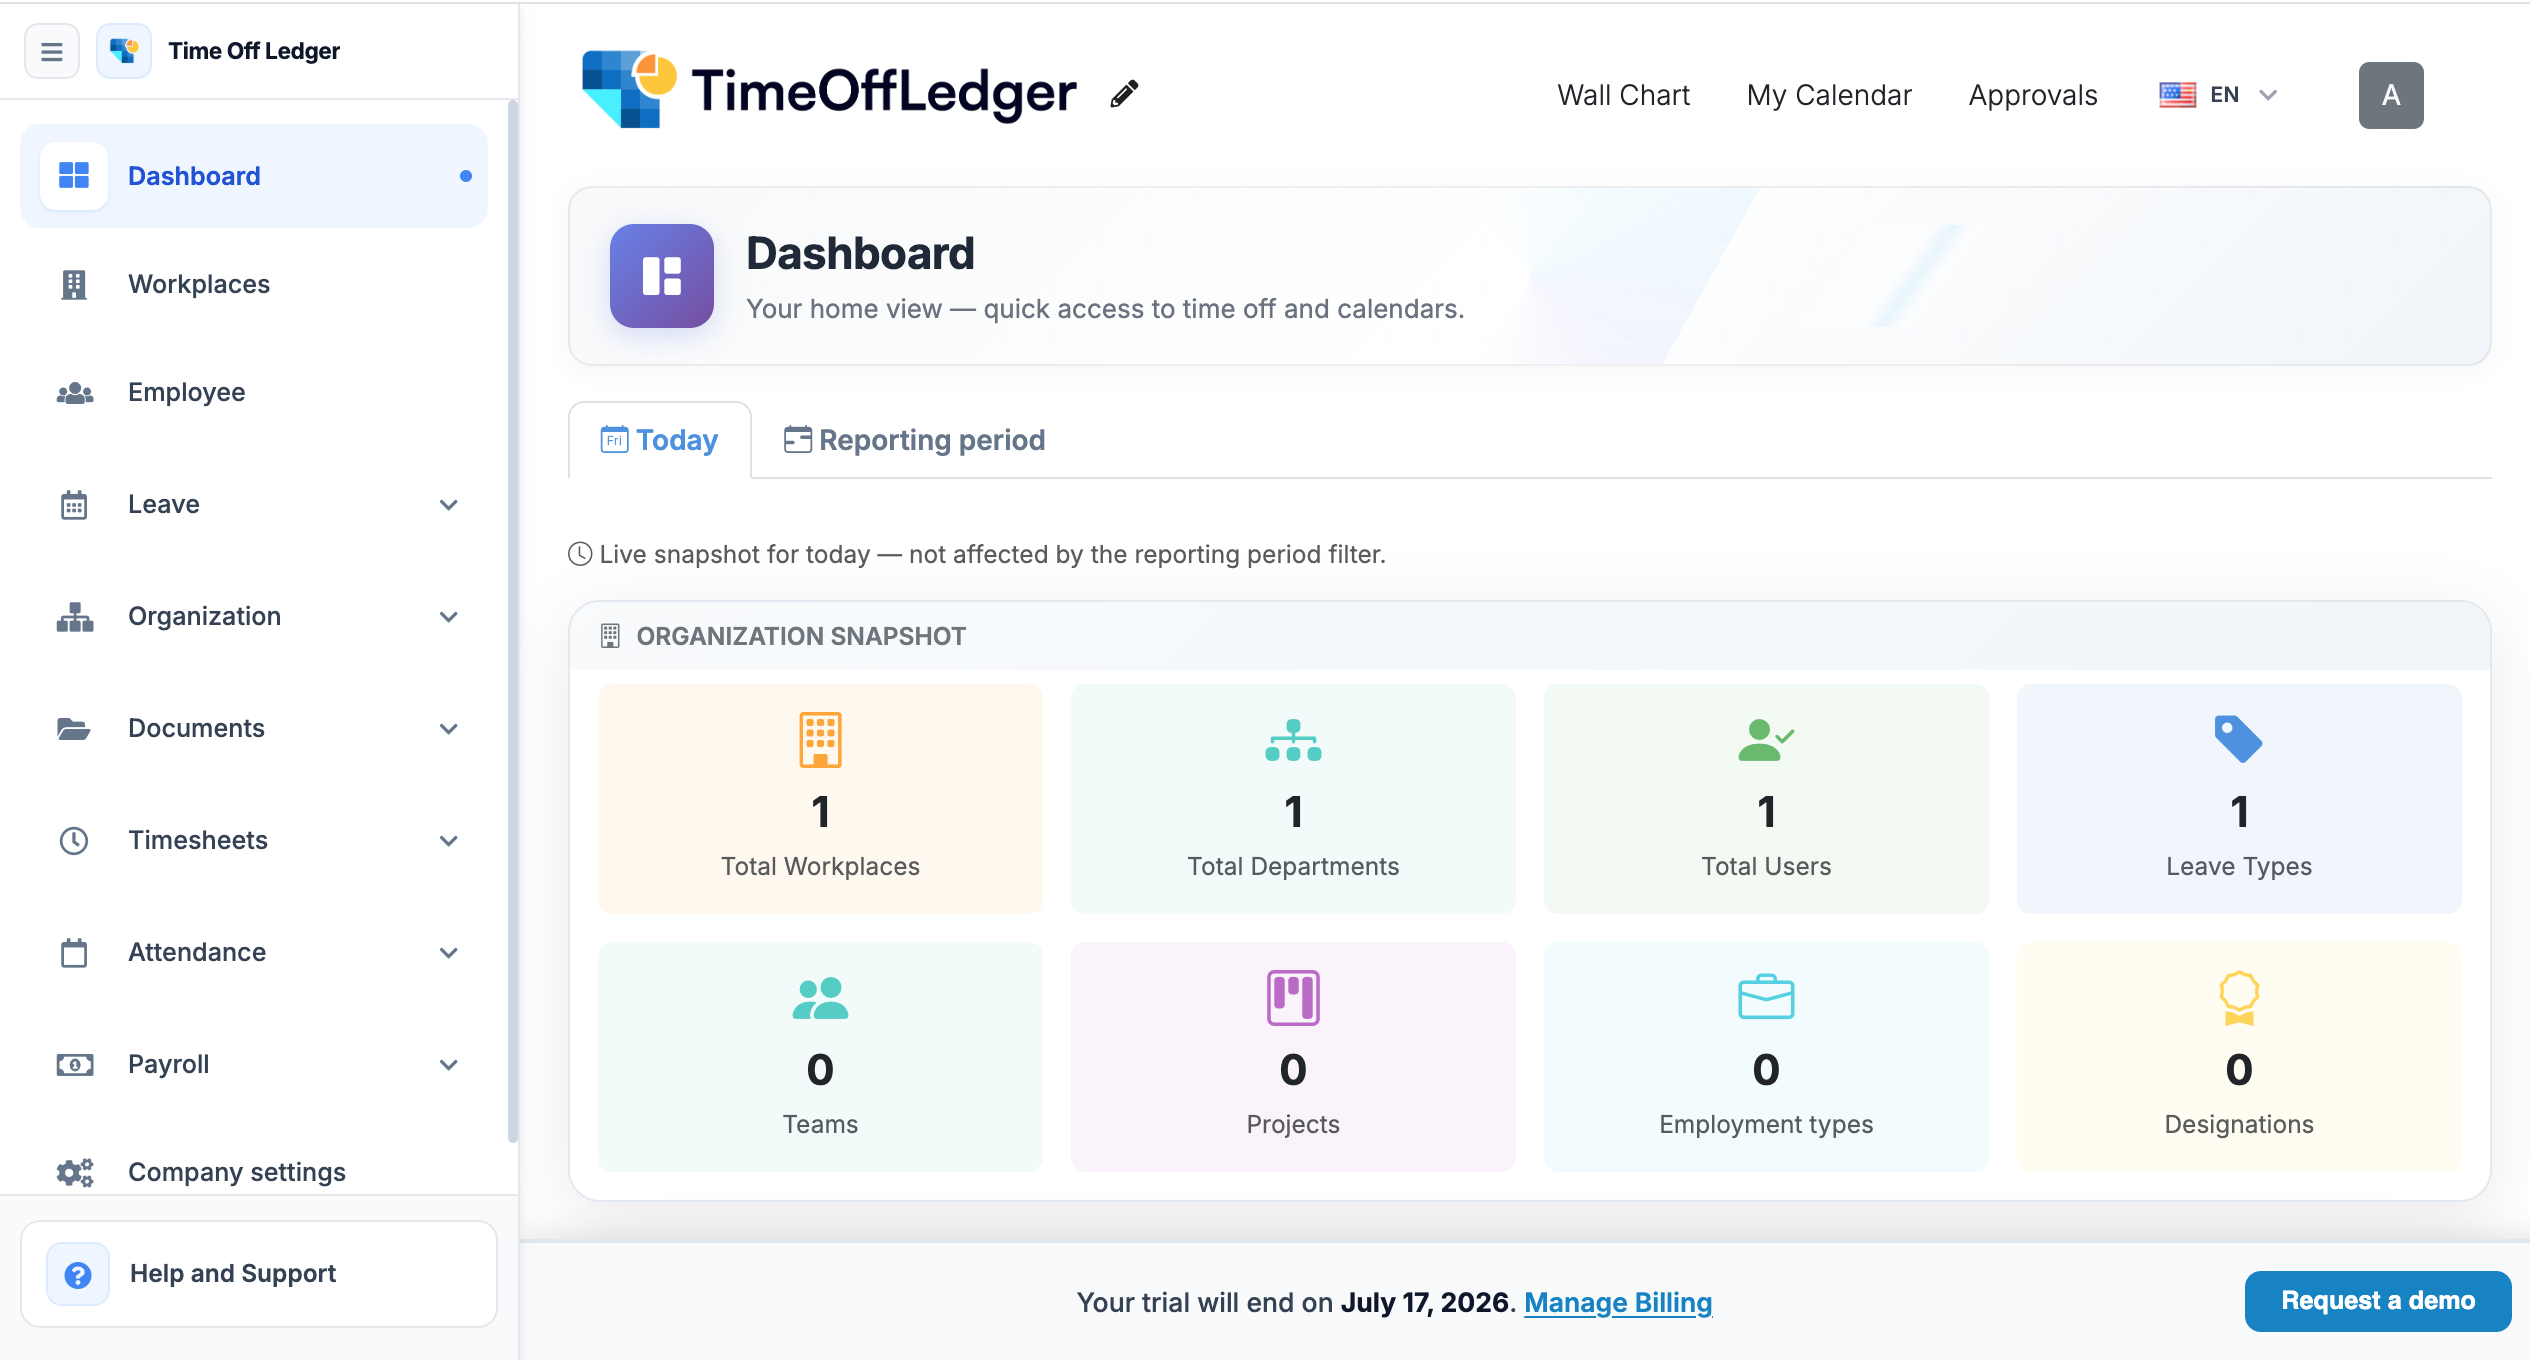
Administrators
- Manage employees and departments.
- Configure company settings.
- Create and edit leave policies.
- Manage public holidays.
- View reports and leave analytics.
- Configure approval workflows.
Keep Your Account Secure
To help protect your account:
- Never share your password with anyone.
- Always sign out when using a shared or public computer.
- Use a unique password that isn’t used for other online accounts.
- Update your password regularly if required by your organization.
Common Login Issues
Incorrect Email or Password
If you receive an error when signing in:
- Check that you’ve entered the correct email address.
- Ensure your password is typed correctly.
- Verify that Caps Lock is turned off.
- Try entering your password again carefully.
Forgot Your Password
If you’ve forgotten your password, select Forgot Password on the login page and follow the instructions to reset it.
For detailed instructions, see the Resetting Your Password article.
Account Not Verified
If you haven’t verified your email address, you may not be able to sign in.
Check your inbox for the verification email and follow the activation instructions. If necessary, request a new verification email.
Account Disabled
If your account has been disabled by your organization’s administrator, you won’t be able to sign in until access has been restored.
If you believe this is an error, contact your company administrator.
Yes, although we recommend using your work email so your account is associated with your organization.
The number of employees you can add depends on your organization’s subscription plan.
Yes. You can access your TimeOffLedger account from multiple supported devices using the same login credentials.
For security reasons, your session may expire after a period of inactivity. Simply log in again to continue using TimeOffLedger.
Employee information can change over time. Whether someone changes departments, receives a promotion, updates their contact information, or is assigned a new manager, TimeOffLedger makes it easy for administrators to keep employee records accurate and up to date.
Keeping employee information current helps ensure leave requests are routed correctly, reports remain accurate, and approval workflows continue to function as expected.
Who Can Edit Employee Information?
Only users with Administrator permissions can edit employee profiles. Depending on your organization’s settings, employees may also be able to update certain personal details, such as their profile picture or contact information.
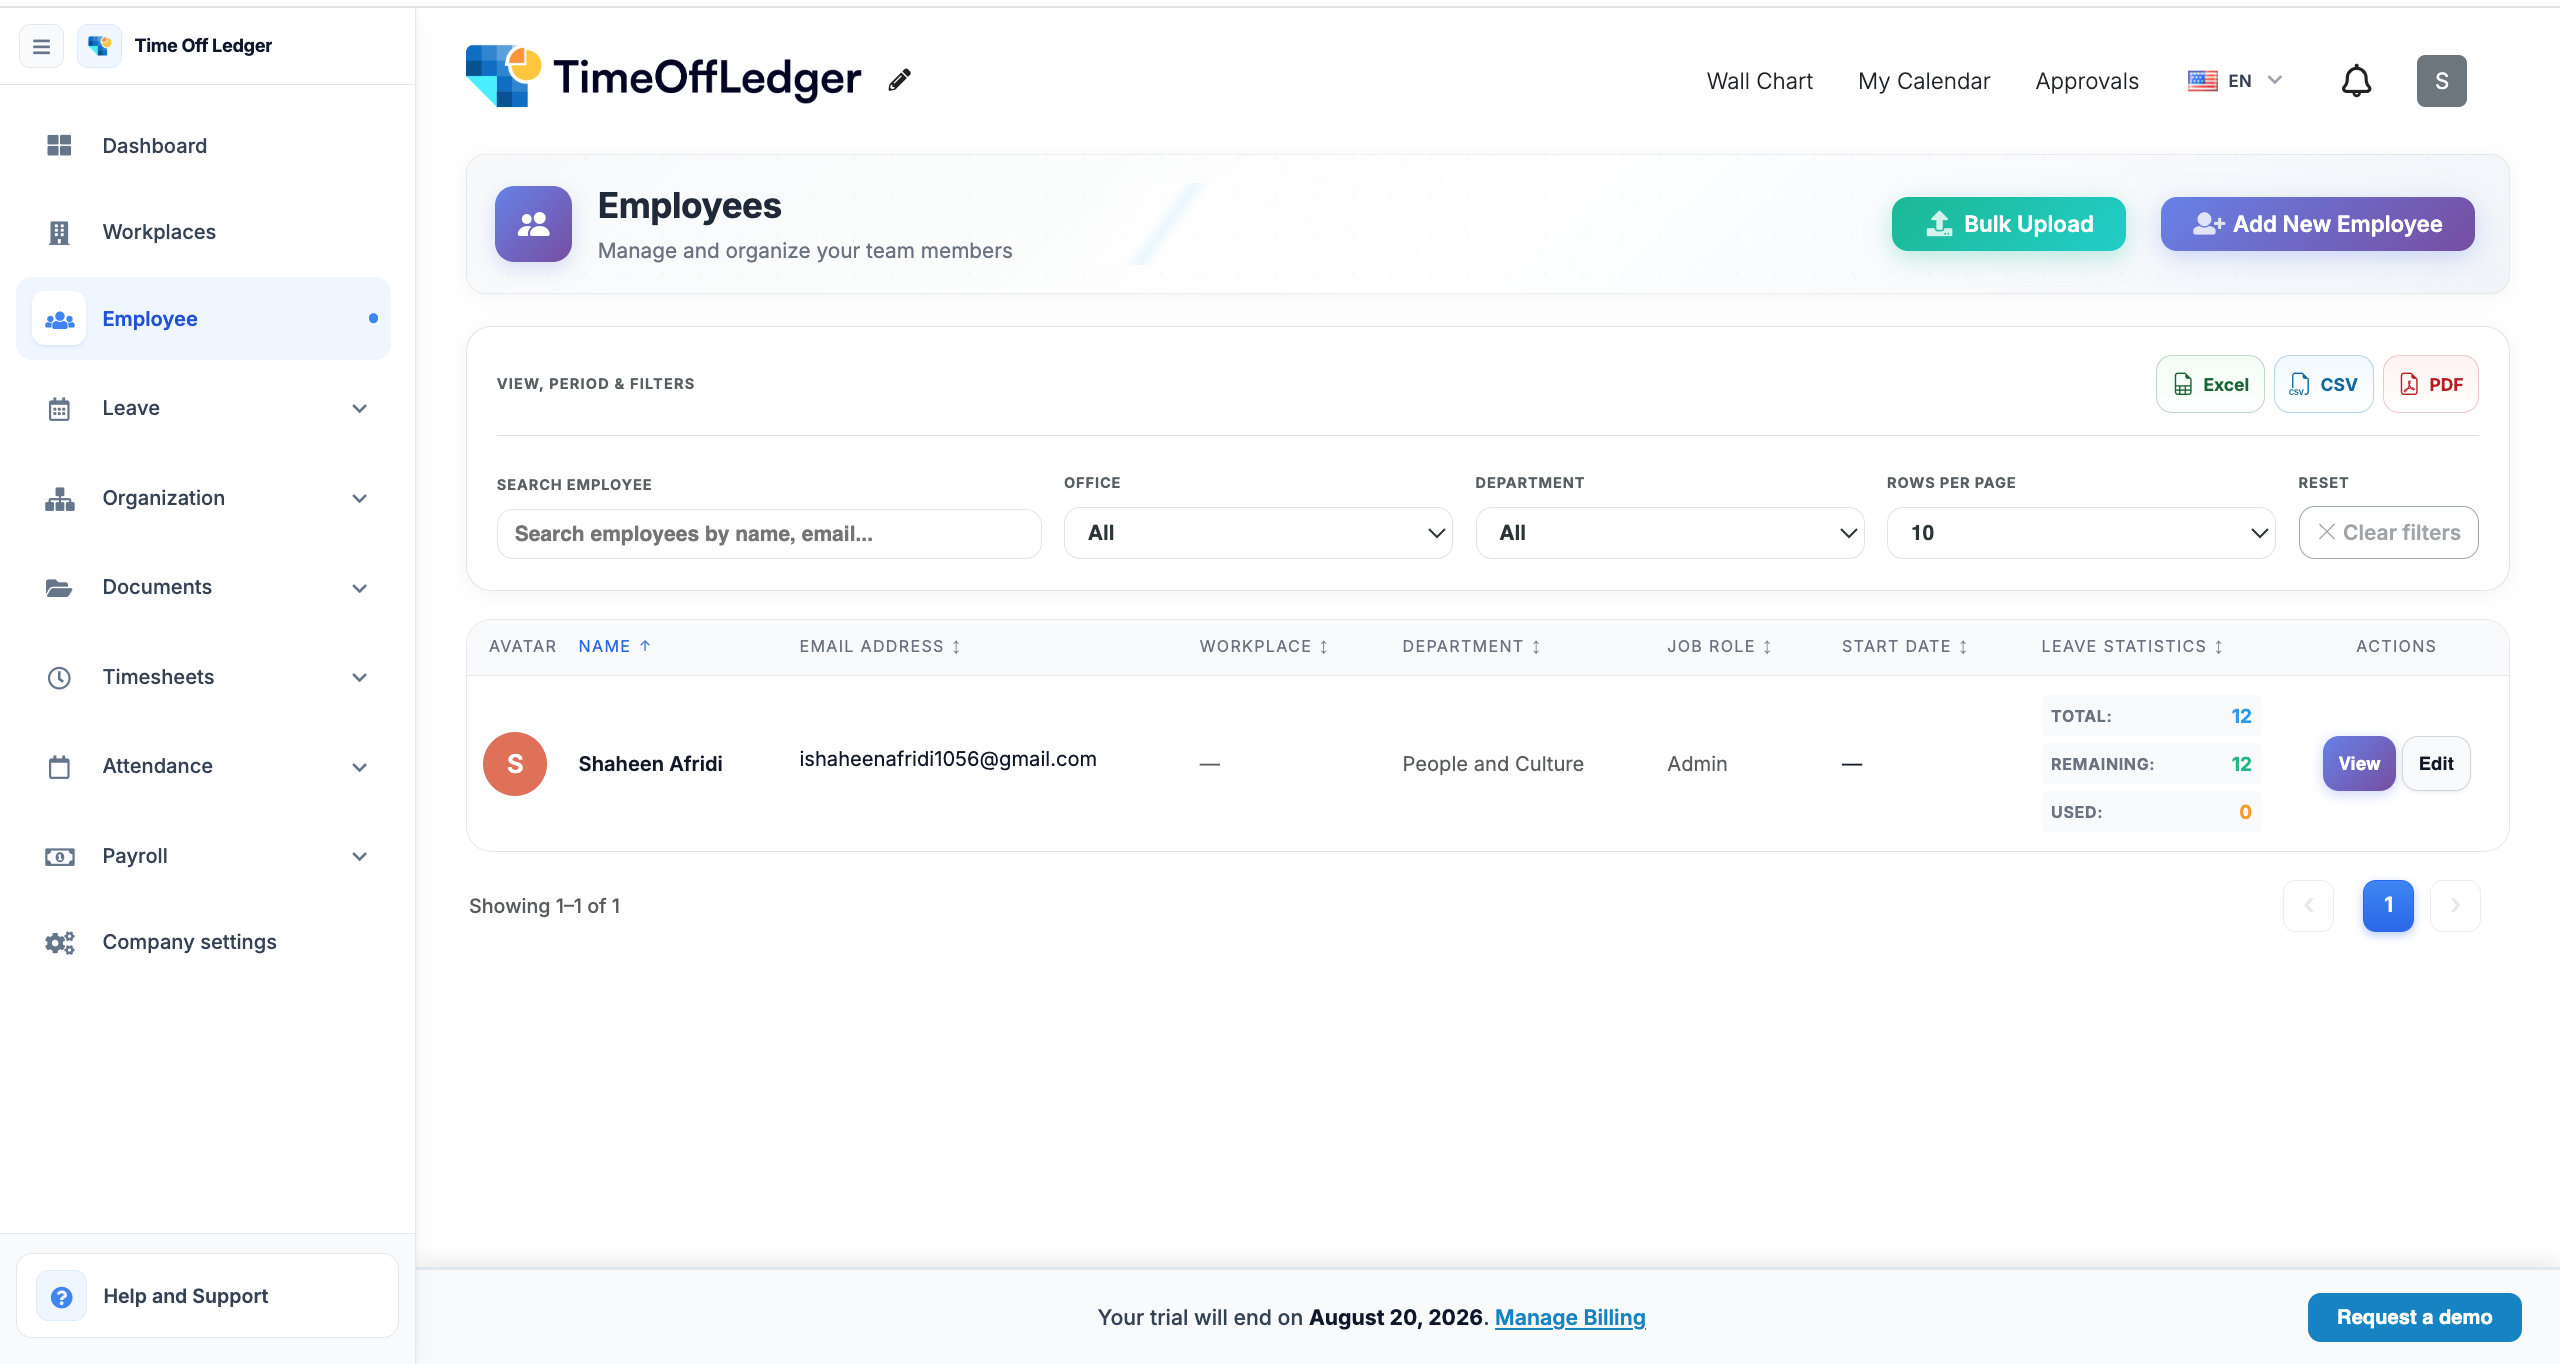
How to Edit an Employee
Follow these steps to update an employee’s information:
- Sign in to your TimeOffLedger account.
- Navigate to Employees from the main menu.
- Locate the employee you want to edit.
- Click on the employee’s profile.
- Select Edit.
- Update the required information.
- Click Save Changes.
Your changes will take effect immediately.
Information You Can Update
Depending on your organization’s configuration, you may be able to edit:
- Full name
- Job title
- Work email address
- Department
- Manager
- Employee role
- Leave policy
- Employment status
- Start date
- Profile photo
Some fields may be restricted to maintain historical accuracy or comply with company policies.
Updating an Employee’s Manager
Assigning the correct manager ensures leave requests are sent to the appropriate approver.
To update a manager:
- Open the employee’s profile.
- Find the Manager field.
- Select the new manager from the list.
- Save your changes.
Future leave requests from the employee will be routed to the newly assigned manager.
Changing Departments
If an employee moves to a different department:
- Open the employee profile.
- Update the Department field.
- Save the changes.
Department changes help keep reports, team calendars, and employee lists organized.
Updating Leave Policies
If an employee changes roles or becomes eligible for a different leave entitlement, you may need to assign a new leave policy.
To update the leave policy:
- Open the employee profile.
- Select the appropriate leave policy.
- Save your changes.
The employee’s leave balances may be recalculated based on the new policy, depending on your organization’s configuration.
Best Practices
To keep employee records accurate:
- Review employee information regularly.
- Update records immediately after organizational changes.
- Verify manager assignments after restructuring.
- Ensure employees are assigned the correct leave policy.
- Double-check email addresses before saving.
Common Issues
Unable to Edit an Employee
If you cannot edit an employee’s information:
- Confirm you have Administrator permissions.
- Check whether the employee account has been deactivated.
- Refresh the page and try again.
Incorrect Leave Balance After Updating
If leave balances appear incorrect after assigning a new leave policy, review the employee’s leave entitlement and policy settings. Changes to leave policies may affect available balances.
Employee Not Appearing in the List
If you cannot find an employee:
- Use the search feature.
- Check if filters are applied.
- Verify whether the employee has been deactivated.
Yes. Administrators can update an employee’s work email address at any time. If the email is used for login, the employee should use the new email address the next time they sign in.
No. Historical leave requests and approvals remain intact unless specifically modified
Yes. Administrators can update user roles whenever responsibilities change. New permissions take effect immediately after saving.
The Company Settings page contains your organization’s core information, including company details, contact information, and other general preferences.
Only users with Administrator permissions can access and modify these settings.
Before You Begin
Before updating your company settings, make sure:
- You have Administrator access.
- You have the correct company information available.
- You understand how changes may affect your organization.
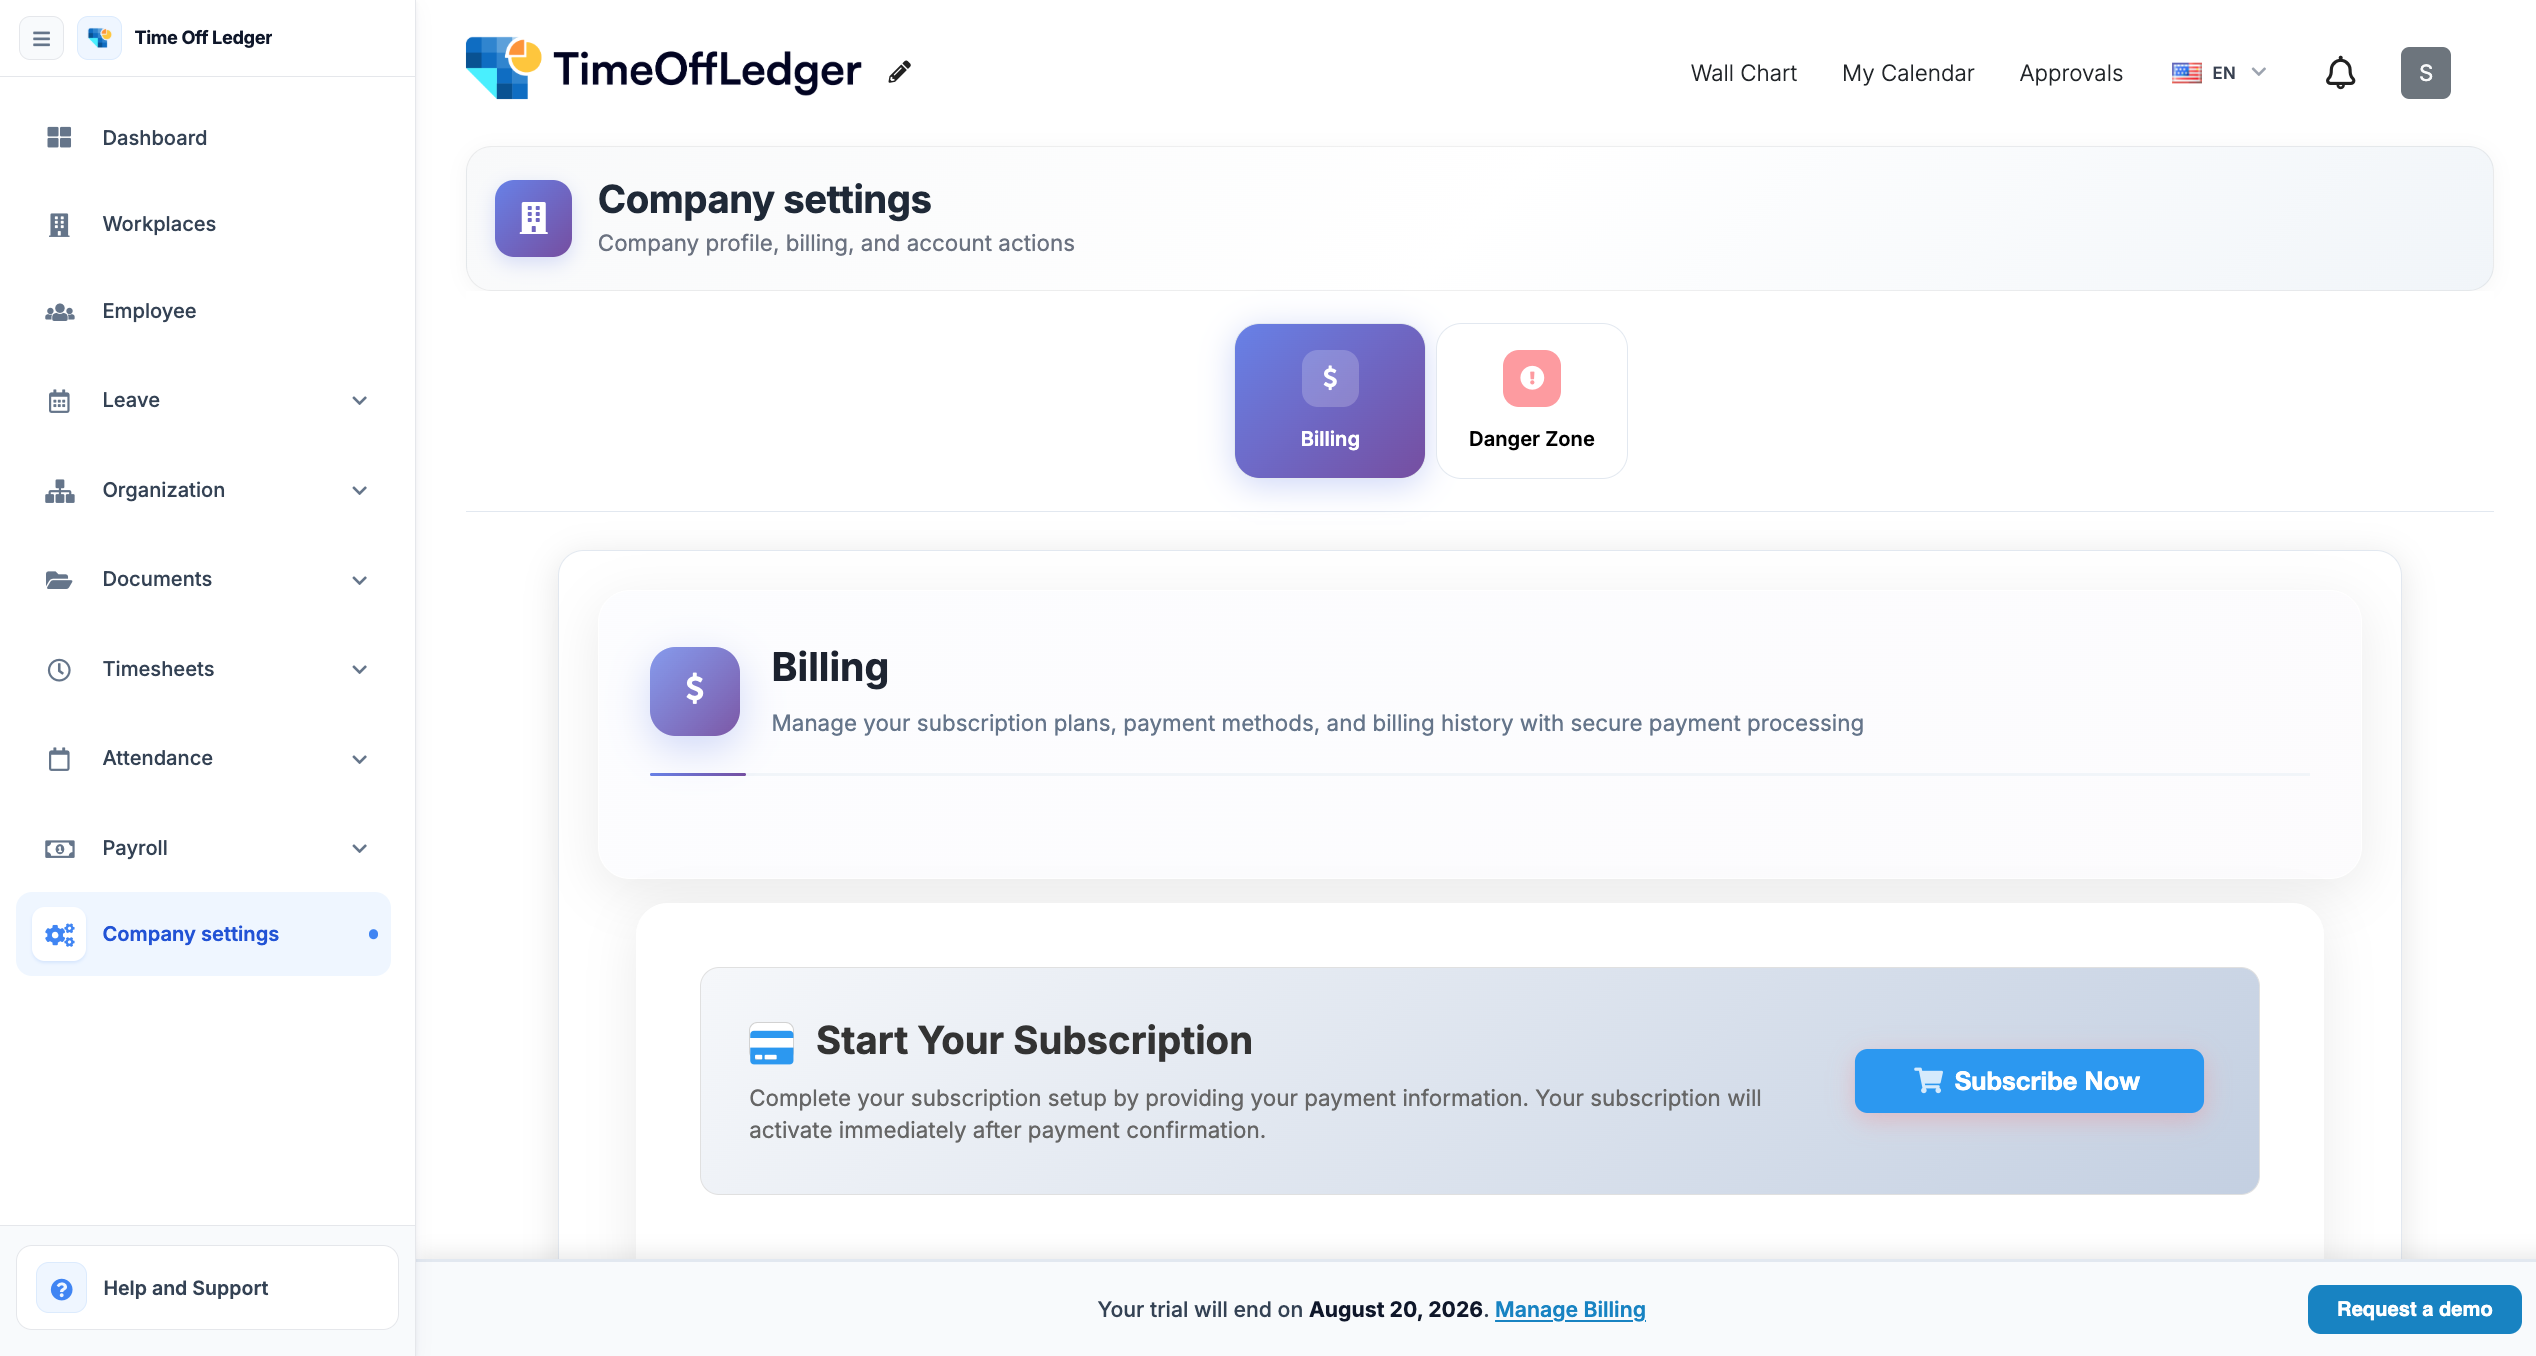
Accessing Company Settings
Step 1: Open Settings
- Sign in to your TimeOffLedger account.
- Click Settings from the navigation menu.
- Select Company Settings.
Capture the Settings menu with Company Settingshighlighted.
Step 2: Update Company Information
You can update information such as:
- Company Name
- Company Logo
- Contact Email
- Phone Number
- Company Address
- Website
- Organization Size (if applicable)
After making your changes, click Save Changes.
Capture the Company Information form showing editable fields.
Step 3: Verify Your Changes
Once saved, review your organization profile to ensure the updated information appears correctly throughout the application.
Capture the updated Company Profile or dashboard.
Best Practices
- Use your official company name.
- Upload a high-quality company logo.
- Keep contact information up to date.
- Review company settings periodically.
- Verify all changes before saving.
Common Issues
Changes Are Not Visible
Refresh your browser or sign out and sign back in to ensure the latest settings are loaded.
Unable to Save Changes
Verify that all required fields have been completed and that you have Administrator permissions.
Incorrect Company Information
Double-check the entered details before saving. If necessary, edit the information again and save your changes.
Only users with Administrator permissions can update company settings.
Yes. You can upload a new logo at any time to keep your organization’s branding up to date.
No. Updating company information does not affect employee accounts or leave records.